Through the weeks of our Mircrobiology Lab we conducted many many tests to determine our bacteria. Finally, with all our results in hand, we followed a flow chart to finally discover the name of this elusive bacteria. And by the end we discovered that it was Micrococcus Roseus.
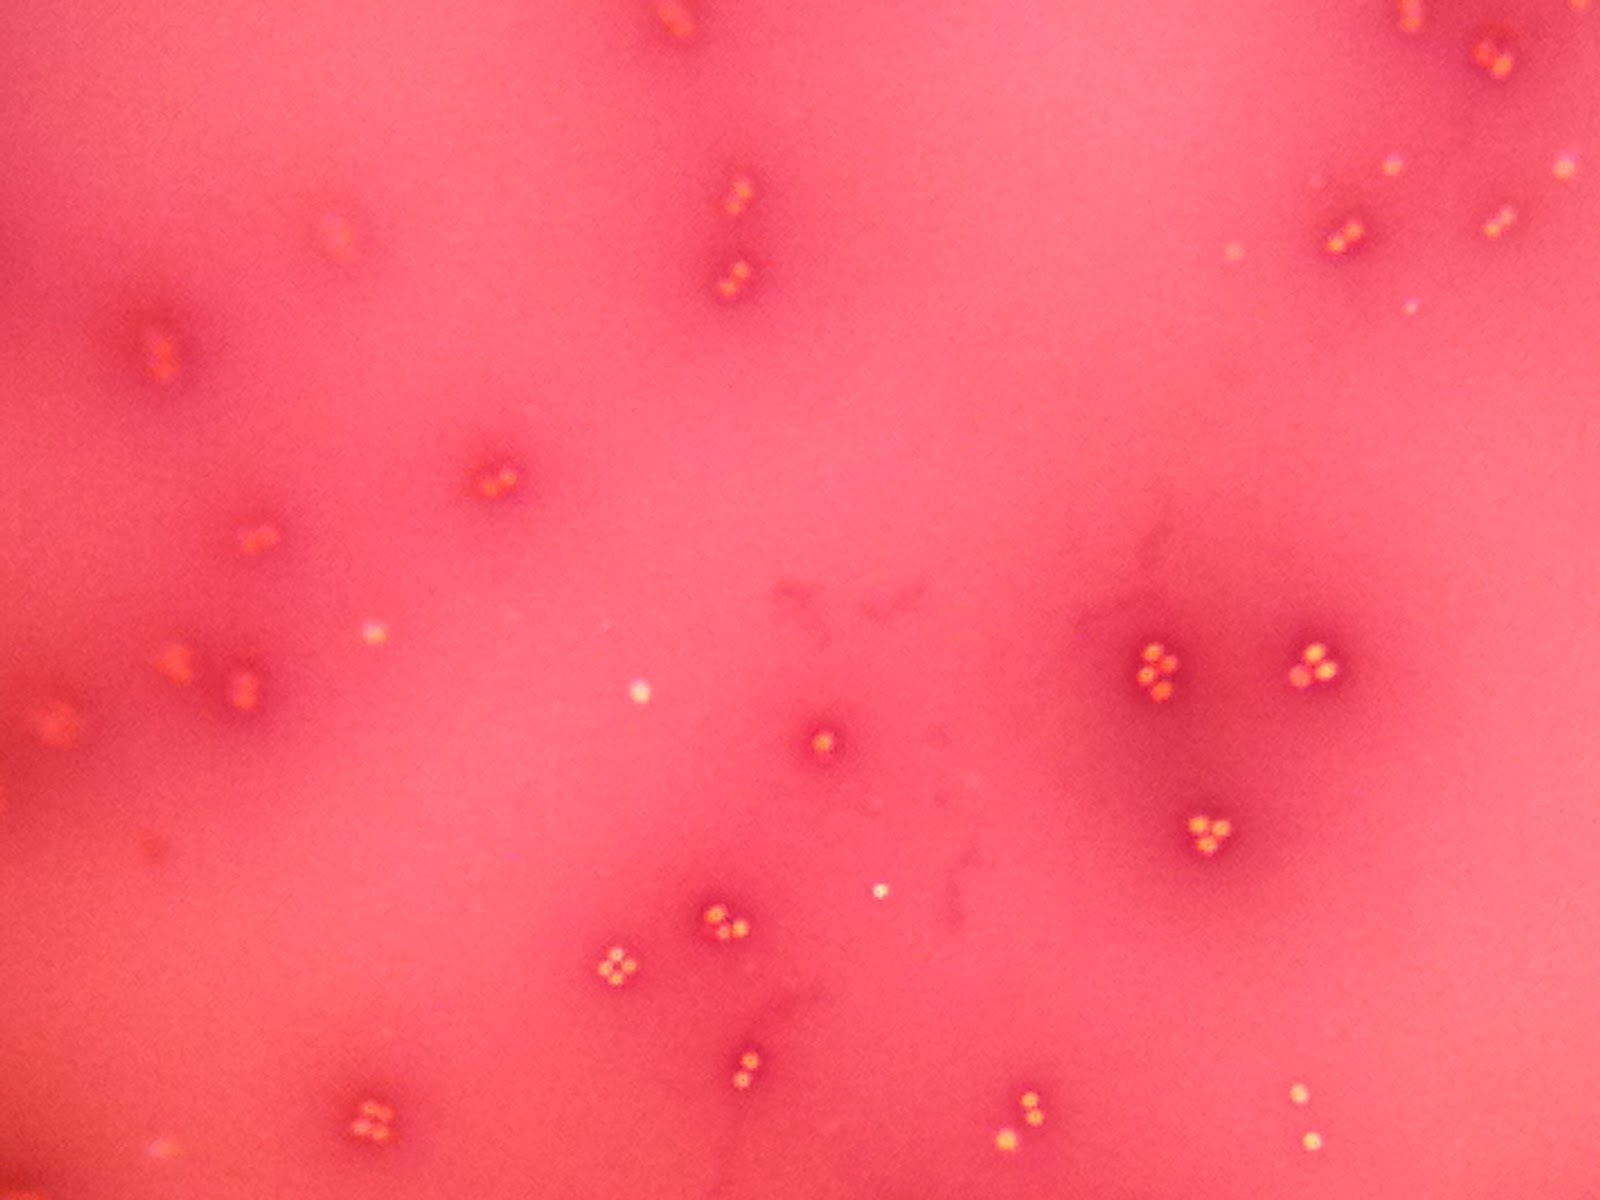
Micrococcus roseus is a gram positive bacterial cell that grows in the tetrad arrangement. The normal habitat for this Micrococcus species is skin, soil, and water. It derives its name from the carotenoid pigment that it secretes. Isolated colonies on a TSA plate are circular, 1.0-1.5μg in size, slightly convex, smooth, and pink in color. Optimal growth temperatures range from 25-35 degrees Celsius. Micrococcus roseus is a strictly aerobic organism.
And thus we come to the end of our journey, and have learned, through much patience and dedication, the identity of our bacteria. Nice to meet you Micrococcus Roseus.
Wednesday, December 14, 2011
The 7th week of lab we continued to come closer to determining what our bacteria was.
We performed the Starch Hydrolysis Test next. This test is to distinguuish among bacteria in terms of their ability to hydrolyze (digest) starch.
Plants store clucose as bery large molecules called starch. Starch is made up of amylose, a long unvranched bolymer of several hundred glucose subunits, and amylopectin, a branched polymer. When plants die, bacteria in the soil digest the starch in the plant cells. The bacteria use an extracellular enzyme called amylase to hydrolyze the bonds that link the glucose subunits. The products glucose and maltose are transported across the bacterial plasma membrane, where they are used for energy and construction of other biomolecules.
Starch in a medium is detected by adding an iodide/iodine solution. When iodine reacts with starch, a purple-black color develops. If bacteria growing on starch agar produce amylase, all of the starch around the growth will be consumed after incubation. When iodine is added, no color change around the bacterial growth means that starch is no longer present. This is a positive test for starch hydrolysis.
Our result was negative, as evidenced by the lack of a clear zone around the bacteria.

Next we performed the Casein Hydrolysis Test to distinguish among bacteria in terms of their ability to hydrolyze casein, the major protein in milk.
Many bacteria secrete enzymes to hydrolyze proteins in their immediate surroundings. The resulting amino acids and peptides are then transported across cell membranes where they are used to construct bacterial proteins, to serve as carbon and nitrogen sources, and to serve as an everygy source.
Casein, the predominant protein in milkm can be used as a substrate to assess the production of proteinases by certain bacteria. When mixed with agar, casein forms a white colloid with calcium ions. When bacteria secrete caseinase, a specific protease, casein molecules are digested an the area around the bacterial growth becomes clear. This clear zone is a positive test. If the bacteria do not secrete caseinase, the medium remains white around the bacterial growth.
Our bacteria tested negative to this test.
 Next was the Fat (Triglyceride) Hydrolysis Test. The purpose of this test was to determine the ability of our bacteria to hydrolyse a tryglyceride, a type of lipid.
The test medium for triglyceride hydrolysis is tributyrin agar. Tributyrin is an oily triglyceride that is emulsified with melted agar. The cooled medium appears cloudy. When bacteria growing on the medium secrete lipases that hydrolyze tributyrin, a clear zone appears around the groth. THis represents a positive test for lipid hydrolysis.
Our bacteria tested negative, as evidenced by the lack of a clear zone.
 Next we performed the Gelatin Hydrolysis Test. This was to determine if our bacteria could hydrolyze gelatin.
Our bacteria tested negative, the gelatin was still solid, with no liquid.
Our bacteria also tested negative to the Triple Sugar Iron Agar Test.
It tested negative to the Litmus Milk Reactions test, as evidenced by a lack of color change.
It tested negative to the Methyl Red Test: It was clear, pale, no color.
In the Fermentation of Carbohydrates test: it tested negative to the Sucrose test, negative to the Lactose test, and Positive to the Glucose test.
It also tested negative to the Voges-Proskauer Test (Butanediol Fermentation)


Finally, we determined through the Kirby-Bauer Technique, which is used to determine the sensitivity of our bacteria to several antibacterial medicines. Our bacteria was determined to be sensitive to all of them.


We performed the Starch Hydrolysis Test next. This test is to distinguuish among bacteria in terms of their ability to hydrolyze (digest) starch.
Plants store clucose as bery large molecules called starch. Starch is made up of amylose, a long unvranched bolymer of several hundred glucose subunits, and amylopectin, a branched polymer. When plants die, bacteria in the soil digest the starch in the plant cells. The bacteria use an extracellular enzyme called amylase to hydrolyze the bonds that link the glucose subunits. The products glucose and maltose are transported across the bacterial plasma membrane, where they are used for energy and construction of other biomolecules.
Starch in a medium is detected by adding an iodide/iodine solution. When iodine reacts with starch, a purple-black color develops. If bacteria growing on starch agar produce amylase, all of the starch around the growth will be consumed after incubation. When iodine is added, no color change around the bacterial growth means that starch is no longer present. This is a positive test for starch hydrolysis.
Our result was negative, as evidenced by the lack of a clear zone around the bacteria.

Next we performed the Casein Hydrolysis Test to distinguish among bacteria in terms of their ability to hydrolyze casein, the major protein in milk.
Many bacteria secrete enzymes to hydrolyze proteins in their immediate surroundings. The resulting amino acids and peptides are then transported across cell membranes where they are used to construct bacterial proteins, to serve as carbon and nitrogen sources, and to serve as an everygy source.
Casein, the predominant protein in milkm can be used as a substrate to assess the production of proteinases by certain bacteria. When mixed with agar, casein forms a white colloid with calcium ions. When bacteria secrete caseinase, a specific protease, casein molecules are digested an the area around the bacterial growth becomes clear. This clear zone is a positive test. If the bacteria do not secrete caseinase, the medium remains white around the bacterial growth.
Our bacteria tested negative to this test.

The test medium for triglyceride hydrolysis is tributyrin agar. Tributyrin is an oily triglyceride that is emulsified with melted agar. The cooled medium appears cloudy. When bacteria growing on the medium secrete lipases that hydrolyze tributyrin, a clear zone appears around the groth. THis represents a positive test for lipid hydrolysis.
Our bacteria tested negative, as evidenced by the lack of a clear zone.

Our bacteria tested negative, the gelatin was still solid, with no liquid.
Our bacteria also tested negative to the Triple Sugar Iron Agar Test.
It tested negative to the Litmus Milk Reactions test, as evidenced by a lack of color change.
It tested negative to the Methyl Red Test: It was clear, pale, no color.
In the Fermentation of Carbohydrates test: it tested negative to the Sucrose test, negative to the Lactose test, and Positive to the Glucose test.
It also tested negative to the Voges-Proskauer Test (Butanediol Fermentation)

Next, was the Urea Test to which our bacteria tested positive; meaning it is able to hydrolyze urea.
Next our bactera tested negative to the Indole (Tryptophan Degradation) Test. Which means that our bacteria does not use tryptophan as a source of energy.

It also tested negative to the Citrate Test, it does not utilize citrate.

Finally, we determined through the Kirby-Bauer Technique, which is used to determine the sensitivity of our bacteria to several antibacterial medicines. Our bacteria was determined to be sensitive to all of them.


As our 6th week of lab rolled around, we were getting closer and closer to being able to identify this unknown bacteria. Our 6th week focused on discovering our bacteria's oxygen requirements. This week we also said a fond farewell to our environmental bacteria. It had served its purpose in giving us another type of bacteria to experiment our staining skills with, but now it was time to focus on our unknown.
First, we did the Nitrate Reduction Test. The purpose of this test was to determine if our bacteria was able to reduce nitrate ions to either nitrite ions or to nitrogen gas.
In anaerobic respiration, bacteria add electrons that have been passed along the electron transport chain to an inorganic substance that is not oxygen. One such final electron acceptor is the nitrate ion. The enzyme complex nitrate reductase facilitates this reduction of nitrate ion. For some bacteria to do this, nitrate ions are reduced to nitrite ions.
Other bacteria that use nitrate reduction during anaerobic conditions for energy production are able to reduce nitrate completely to molecular nitrogen. This is called denitrification.
To detect nitrite ions that are products of nitrate reduction by bacteria inoculated in nitrate broth, two reagents are added: sulfanilic acid and dimethyl-1-naphthylamine. If nitrite is present, the medium turns pink or red. This is a positive test for nitrate reduction.
But the absence of a color change cannot be interpreted as a negative test. Either the nitrate ions were not reduced to nitrite ions (a true negative test) or the nitrate ions were completely reduced to molecular nitrogen (a positive test). To distinguish between these two possibilities, a small amount of zinc is added to the tube, which already contains the two reagents. Zinc will reduce nitrate ions to nitrite ions. If the bacteria did not reduce nitrate ions, zinc will do this. Therefore the appearance of a pink or red color after addition of zinc is interpreted as a negative result. No color means the test is positive for nitrate reduction. No nitrate ions remain in the brother because they were completely reduced to molecular nitrogen.

Next, we preformed the Oxidase Test. This test is to determine if bacteria have cytochrome oxidase, a participant in electron transport during respiration. When cytochrome oxidase adds electrons to the oxidase reagent, the reduced for turns dark blue to purple within seconds.

Next we performed the Catalase Test. The purpose of this test was to detect the presence of catalase, an enzyme that degrades hydrogen peroxide.
In aerobic respiration, hydrogen peroxide is a reactive intermediate that forms as oxygen is reduced. H2O2 damages DNA and cell membranes and alters the active sites of some enzymes. Bacteria that tolerate oxygen or require the gas for metabolism use the enzyme catalase to quickly break down H2O2 into water and O2.
When drops of a dilute solution of H2O2 are added onto bacteria containing catalase, bubbles of O2 rapidly appear. These bubbles denote a positive test.
Our bacteria tested positive.
We also discovered our bacteria to be obligate aerobic.
Tuesday, December 13, 2011
During our 5th week of lab we learned about three more stains: the acid fast stain, endospore stain, and capsule stain.
Since our unknown was gram-positive, we could forsee what the results of the acid fast staining would be, but we did the test anyways for practice.
The purpose of this staining is to distinguish between gram positive and gram negative bacteria based on the lipid content in their cell walls: acid fast results in red colored stain, and non-acid fast results in a blue stain.
If done correctly, the staining should result in gram-positive being blue, and gram negative being red.
Gram negative bacteria contain a waxy lipid, mycolic acid, in there cell wall. This lipid makes the cells more durable. Acid fast cell walls are so durable that the stain (carbol fuschin) must be driven into the cells with heat. The cells are then decolorized with acid-alcohol, all other cells will decolorize with this strong solvent, but acid fast bacteria will not. Other cells are then counterstained with methylene blue. Thus the acid fast are left stained red by the carbol fuschin.
This is the result of acid fast staining on our unknown, which we already knew to be gram positive, so this result was appropriate.

This is the result of the acid fast stain on our environmental bacteria which we knew to be gram negative, so this result too was appropriate.

Next the endospore stain of our unknown revealed that our bacteria did not have endospores.
Finally, we did a capsule stain of our unknown and environmental bacteria.
The capsule stain selectively stains external capsules surrounding bacterial cells. First, we prepared a smear of the bacteria in nigrosin, making a negative stain. After allowing the smear to dry we covered it with safranin, and after letting it set, washed it off with water, blotted it dry and examined our slide.
Our result was that neither the unknown nor the environmental samples had capsules.
Monday, December 5, 2011
Disclaimer
All content provided on this blog is
representation of the blog owner and not Franciscan University of Steubenville.
The information on this site is purely used for education purpose. The owner of
this blog makes no representations as to the accuracy or completeness of any
information on this site or found by following any link on this site. The owner
will not be liable for any errors or omissions in this information nor for the
availability of this information. The owner will not be liable for any losses,
injuries, or damages from the display or use of this information.
Privacy
The owner of this blog does not
share personal information with third-parties nor does the owner store
information is collected about your visit for use other than to analyze content
performance through the use of cookies, which you can turn off at anytime by
modifying your Internet browser’s settings. The owner is not responsible for
the republishing of the content found on this blog on other Web sites or media
without permission.
The owner of this blog reserves the
right to edit or delete any comments submitted to this blog without notice due
to;
1. Comments deemed to be spam or
questionable spam
2. Comments including profanity
3. Comments containing language or concepts that could be deemed offensive
4. Comments that attack a person individually
2. Comments including profanity
3. Comments containing language or concepts that could be deemed offensive
4. Comments that attack a person individually
This policy is subject to change at
anytime.
Tuesday, November 8, 2011
A lot has happened in micro lab since the last time we posted. Several different bacteria grew from our sample from the penny we found at the Pub. In the end we chose to make our pure sample from a yellow bacteria with the most interesting shape of any we could find on the agar plate.

Under the microscope, the bacteria sample we selected looked like this:

Over the next few weeks, we struggled over and over again to get our bacteria to make an entirely pure culture without luck until this past week. As you can kind of see in the picture above through the microscope, there was a grey circular bacteria growing together with the bacteria we were trying to single out, always leaving us with a compromised culture of bacteria. Eventually, we gave up on our exciting yellow bacteria and surrendered to the forces of the rather boring grey bacteria we could not get rid of. Last class, we took a picture from our completely pure culture of grey bacteria:

But we are getting way ahead of ourselves and there was a long process before we surrendered "pure culture rights" to our stubborn grey bacteria. Let's move back to September 8, 2011 where we attemped to make our first pure culture. As you can see in the picture of our pure sample, there is a particular strategy to streaking a plate. Going counter-clockwise, streak the plate with a sample of bacteria on the end of a loop in four sections. It's not as complicated as it sounds.
On September 13, we used another way to grow bacteria, on a slant. We used this process for the unknown bacteria we will be identifying by the end of the semester. So, now we have two bacteria to work with: one from the penny and another given to us to identify.

On September 13, we used another way to grow bacteria, on a slant. We used this process for the unknown bacteria we will be identifying by the end of the semester. So, now we have two bacteria to work with: one from the penny and another given to us to identify.

Making a slant is very simple. The process is the same as in the case of transferring the bacteria to the agar plate except for the technique of inoculation. Simply move the loop back and forth over the surface of the slant from bottom to top and the transfer is complete. A simple description of our unknown bacteria from basic observance includes a light red color, glossiness, and opaqueness.
The fist time we had a real good look at either of our bacteria up close was with a simple stains we made of them. There are a few steps to make a simple stain beginning with making a smear of the bacteria. We first began with a clean slide and placed a drop of distilled water onto it. Then, after sterilizing our instruments,

took a sample of our bacteria from the agar plate (or the slant in the case of the unknown) and mixed it in with the water, spreading around the slide. All that was left to do is wait for the solution to air dry...

...wave it over the flame of the Bunsen Burner to fix it, and the smear was complete. After that, the staining began. By covering the fixed smear with dye and allowing it to sit, the bacteria retained the color, making them visible at the microscopic level. We made two different kinds of stains, one acidic and one basic. The acidic stain binds to the proteins in the bacteria causing a negative change. Contrarily, the basic stain had a positive change, binding to the nucleic acids and other cellular components.

Here you can see a blue stain of our unknown sample. From this stain, we deduced that our bacteria is a cocci bacteria, meaning it has a circular shape. Also, our bacteria grows in clusters. Each of the tiny circles are different individual bacteria from our sample.

Our environmental sample (above) had a circular margin, was raised, and is classified as undulate. From the semisolid agar motility test performed on both the unknown and the environmental bacterium, we discovered that both are non-motile. Motility refers to a bacteria's ability to move spontaneously or on its own. Therefore, neither of our bacteria can move on their own. We tested this by inoculating the semisolid agar with the bacteria in the same way as before except that the agar is pierced straight through and, if the line of bacteria grows laterally, it is motile.


So, to keep the gathered information together up to this point, our unknown bacteria (the one we will be testing to the end) is light red in color, glossy, opaque, has its entire edge raised, is non-motile, and grows in spheres in clusters.

The next test performed on our bacterium told us whether each of them were gram-negative or gram-positive. Gram-positive bacteria have a much thicker layer of peptidoglycan in their cell wall, causing them to keep the first stain they receive much better than a gram-negative bacteria as shown below.

The next test performed on our bacterium told us whether each of them were gram-negative or gram-positive. Gram-positive bacteria have a much thicker layer of peptidoglycan in their cell wall, causing them to keep the first stain they receive much better than a gram-negative bacteria as shown below.

The first step of the staining process is to prepare a fixed smear of the bacteria as in past labs. Next, crystal violet is applied to the slide for 20 seconds.

After the smear is rinsed for excess dye, iodine is applied to the smear for one minute then rinsed again. The smear is then decolorized with 95% ethyl alcohol and rinsed again. As you can see in the chart above, the reactions of the two different types of bacteria at this point are already different. After decolorization, the color leaves a gram-negative bacteria but sticks in the gram-positive bacteria. This is why gram-positive bacteria have a purple/violet color to them and gram-negative bacteria do not. In the last step of the gram stain process, safranin is applied to the stain for a minute before one last rinse and a gentle blot to remove excess liquid.


The next lab, on September 22, 2011, we first looked closer at colony morphology and tried to identify our bacterium more accurately. We made simple stains of our bacteria and looked for shape, how/if they cluster, and the rest we had already accurately identified such as the raised edge.

Below is a similar colony morphology chart to the one in our books.

The result was that our unknown bacteria grows in spheres (it s a coccus bacteria - pictured above) and in tetrad clusters (pictured below), clusters of four, while our environmental bacteria grows in single spheres.

Monday, October 3, 2011
Don't put that money in your mouth!
I'm sure you all remember your mother telling you as a child not to put money in your mouth. "You don't know where that's been!" Turns out, our mothers knew a thing or two.
Imagine traveling from coast to coast, passing from hand to hand, pocket to pocket, purse to purse. Dropped on the streets of New York City, and then picked up by a homeless guy as a token of good luck. We really can't know everywhere money goes. So it makes sense to be concerned about the bacteria these coins pick up along their travels.
In our Microbiology Lab this semester we will be discovering what kind of bacteria is living on this not so innocent coin. In addition, and more importantly, we will be using multiple tests and procedures over the weeks to identify an unknown bacteria provided to us by our Professor.
So let us begin.
 Our first week we spent learning lab safety rules such as washing your hands before you begin and after you finish your work, as well as before you leave the lab for our safety, and the safety of others. Also, we learned how to decontaminated out work surface, before and after completing our lab work.
We also learned the Aseptic technique, which is a process used to inoculate culture media with specific bacteria without introducing contaminating microbes.
In addition, we learned different methods of sterilization, such as the autoclave, which creates moist heat at temperatures high enough to kill all bacteria, including endospores. Steam under pressure at 15 lb/ in^2 creates the needed temperature of 121 degrees Celsius. Media, glassware, and cotton swabs are routinely sterilized in an autoclave; it is also used to sterilize contaminated glass tubes and Petri plates.
We also learned about the dry heat method, which uses a hot air oven that reaches the required temperature of 160-180 degrees Celsius. And also, filtration which sterilizes by physically removing microorganisms from solutions with solutes that cannot withstand high temperatures.
Finally we learned how to prepare culture media; which is a sterile media that provides nutritional requirements for cultivation of bacteria.
The four kinds of containers with culture media are:
Imagine traveling from coast to coast, passing from hand to hand, pocket to pocket, purse to purse. Dropped on the streets of New York City, and then picked up by a homeless guy as a token of good luck. We really can't know everywhere money goes. So it makes sense to be concerned about the bacteria these coins pick up along their travels.
In our Microbiology Lab this semester we will be discovering what kind of bacteria is living on this not so innocent coin. In addition, and more importantly, we will be using multiple tests and procedures over the weeks to identify an unknown bacteria provided to us by our Professor.
So let us begin.
We also learned the Aseptic technique, which is a process used to inoculate culture media with specific bacteria without introducing contaminating microbes.
 |
| Aseptic Technique |
 |
| Autoclave |
In addition, we learned different methods of sterilization, such as the autoclave, which creates moist heat at temperatures high enough to kill all bacteria, including endospores. Steam under pressure at 15 lb/ in^2 creates the needed temperature of 121 degrees Celsius. Media, glassware, and cotton swabs are routinely sterilized in an autoclave; it is also used to sterilize contaminated glass tubes and Petri plates.
We also learned about the dry heat method, which uses a hot air oven that reaches the required temperature of 160-180 degrees Celsius. And also, filtration which sterilizes by physically removing microorganisms from solutions with solutes that cannot withstand high temperatures.
Finally we learned how to prepare culture media; which is a sterile media that provides nutritional requirements for cultivation of bacteria.
The four kinds of containers with culture media are:
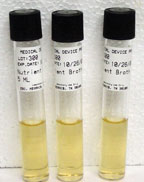 |
| Broth Tube |
 |
| Agar Deep |
 |
| Agar Slant Tube |
 |
| Agar Plate |
Subscribe to:
Posts (Atom)